Table of Contents [hide]
This post is a guide on how to setup Windows for web development. This is my current Windows development environment and terminal setup that I use every day.
Requirements
- A computer running Windows 10 or Windows 11
- A basic level of familiarity with running commands in a command prompt window
A Little History
Years ago, I was a young college freshman about to attend his first Computer Science course. My cousin, who had recently graduated from college and had just begun his first job in the field, was excited to finally get a chance to share his Super Awesome & Productive Development EnvironmentTM with someone.
We spent an evening installing and configuring programs on my barebones Macbook, with the goal of turning it into the ultimate development machine.
I look back fondly on that day, because in the years since, I have come to understand that a developer’s environment and workflow are parts of their skillset that they have accrued over many years of experience, trial, and error.
It is now almost a decade later, and I feel it’s time for me to take some of my knowledge and pay it forward.
On the Topic of Windows
For the longest time, Windows was not really considered a good platform for general purpose development. If you wanted to get things done right, you needed a UNIX-based system.
However, things have changed. Windows really has come a long way, and developing on a properly configured Windows machine is actually a great experience now.
The real change that has made Windows a top-tier dev option, is a little thing called WSL (or Windows Subsystem for Linux) which allows you to install and run an actual Linux distribution from inside Windows itself!
WSL is fully integrated with Windows. You can use Bash in your Linux terminal to run commands on files in your Windows filesystem, and you can browse your Linux files from the Windows file explorer. It’s like a superpower.
Setting Up Your OS for Success
Let’s get into it.
I’ll assume you’ve got either Windows 10 or Windows 11 installed and running already. So let’s go ahead and look at some basic apps that we will use all the time.
Code Editor
First, you need somewhere to write your code.
Honestly, this can be a whole topic of its own. I don’t want to go too deep here, because chances are, you already know what you need to be using.
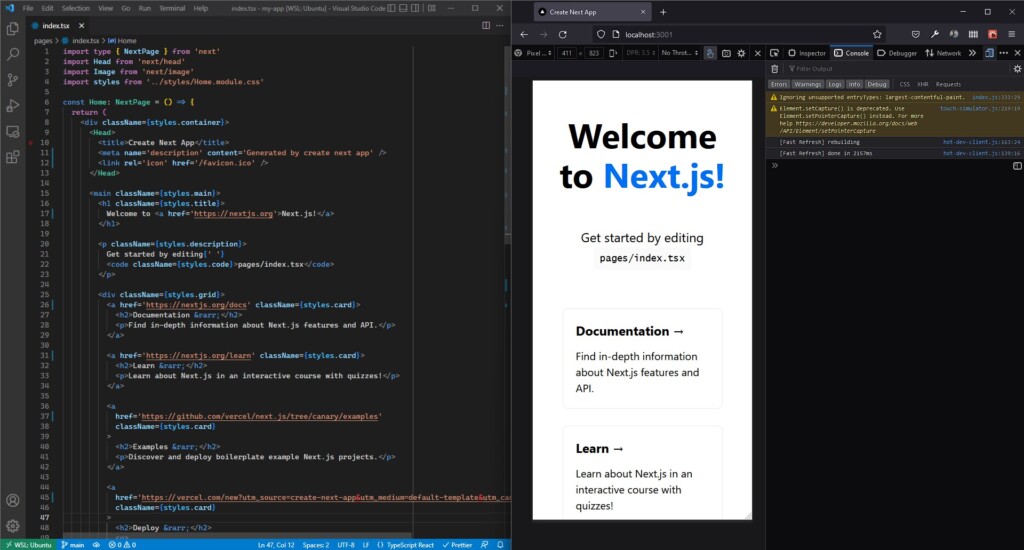
But if you don’t, then for general purpose programming, Visual Studio Code will serve your needs well. It has an absolute litany of tools and extensions for just about any area of development.
Here are a couple of VS Code extensions that I always use no matter what:
- Material Icon Theme: A variety of icons for all types of files and folders in VS Code’s file explorer pane. I find that it improves the clarity of my files a lot.
- Prettier: Simply put, it’s a really well-supported code formatting tool.
Browser
This one is mainly geared towards web developers.
You probably already have your browser of choice installed. That’s totally fine. Keep using it. However, for web development, consider using a separate browser than the one you use for most of your browsing. Two reasons why I think this is a good idea:
- I tend to install a lot of extensions for general browsing, and I don’t want those interfering with my code when I’m developing. (e.g. Ad Blockers blocking external scripts like Google Analytics leads to a clutter of errors in my browser console)
- The browser whose devtools I like most is often not the browser that I like as a general use browser.
That said, either Firefox or any browser that is Chromium-based (e.g. Google Chrome, Microsoft Edge) should have you covered.
Personally, I use either Microsoft Edge or Google Chrome for general use, and Firefox Developer Edition for web development.
Ultimately, you will want to test your work on all major browsers that you want to support anyway, so it’s not a bad idea to have a few installed and ready to go.
WSL (Windows Subsystem for Linux)
This is the big one. The thing that changed everything. The reason we no longer basically require a UNIX-based OS to be a serious developer.
For the purposes of this guide, I will be using Ubuntu as my Linux distribution of choice. That is what I use, and if you aren’t an experienced Linux user, that is what I would recommend you to choose as well.
Microsoft Docs provides a better guide to installing this bad boy on your machine than anything I could write here, but here’s a quick summary anyway:
- (Required for Windows 10 Only) Make sure Windows is up to date.
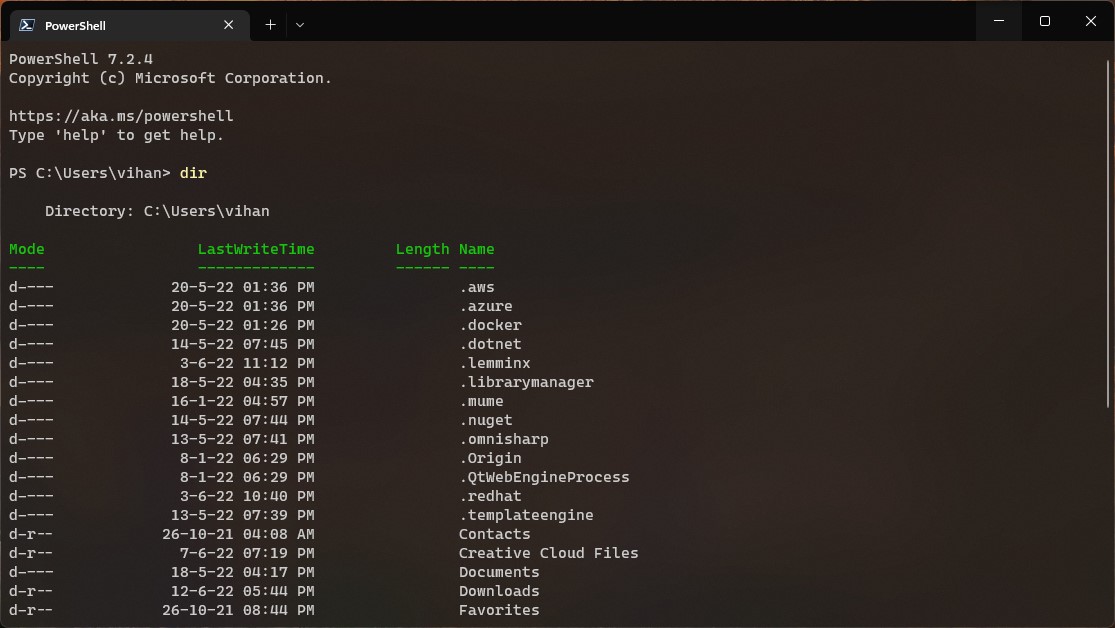
- Run PowerShell as administrator. (Windows 10 and 11 both come with PowerShell)
- Run the command
wsl --install, and restart your machine after it finishes. - Ubuntu will be the distribution that is installed by default. Launch it by searching for it on the start menu, and then set up a UNIX username and password when prompted.
- Close the terminal window for now. We’ll come back to this shortly.
A Tale of Two Terminals
It’s time to spice up our terminal window.
We’re going to use a Windows Store app called Windows Terminal, made by Microsoft themselves. Windows Terminal will act as a shell for both, the Windows-side command prompt PowerShell, and the Linux-side command line (traditionally Bash, but we’re going to spruce that up just a little bit).
Let’s set up Windows Terminal first.
Windows Terminal
On Windows 11, Windows Terminal comes installed by default so you can simply search for it and launch it from the start menu.
On Windows 10, visit the Microsoft Store page for Windows Terminal and click the blue Get in Store app button. This will launch the Microsoft Store app where you can install the program.
Launch Windows Terminal (you probably also want to pin this to your taskbar or start menu for easy access) and open the Settings panel. Find it by clicking the down arrow next to the new tab button on the top bar or using the shortcut CTRL + ,
- On the Startup tab:
- Default profile can be either PowerShell or Ubuntu (your choice)
- Set Default terminal application to Windows Terminal
A Nice Font for Windows Terminal
While we’re at it, let’s get a nice looking font for our new terminal. This part is optional.
- Go to this Microsoft Github repository and download the latest
.zipfile. It should be named something likeCascadiaCode-XXXX.XX.zip. - Extract the archive somewhere.
- Select all the files in the
ttffolder (excluding thestaticfolder), right click, and select Install for all users. You might have to select Show more options first to see the install options on Windows 11. - After that’s done:
- Close and reopen Windows Terminal
- Open Settings with
CTRL+, - Under Profiles, click on Defaults
- Under Additonal settings, go to Appearance
- Change Font face to Cascadia Code
Linux Terminal
Now we need to configure our Ubuntu terminal to be a bit more user-friendly and pretty it up.
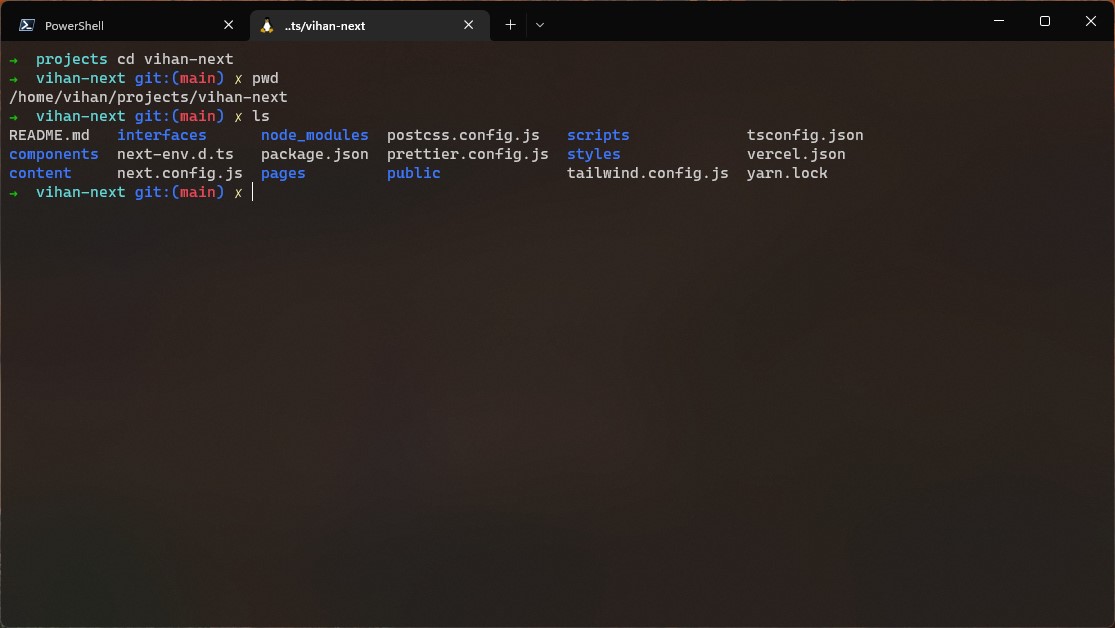
We will launch our Ubuntu command line from Windows Terminal using the down arrow next to the new tab + button.
This is why Windows Terminal is great. It’s a single shell for all our terminal needs. We can use PowerShell to run commands on the Windows side of things, and we can also open an Ubuntu tab on the same shell.
Linux Starting Directory
By default, WSL’s starting directory is going to be inside of the Windows file system. It opens in /mnt/c/Users/your-username. The Windows file system is mounted on to /mnt/..., which is a useful thing to know, but is not great for a default setting.
When running code from Linux, it is a good idea to have the actual code you are running also be on the Linux file system. This is because I/O between the two file systems is slow. So, it’s something we usually want to avoid (although, it is a very useful tool to have just for transferring files between the two). Let’s set a better default starting directory. /home/your-username is the home directory on the Linux file system, and a much more sensible option.
Here’s how:
- Once again, open Windows Terminal’s Settings using the shortcut
CTRL+, - Navigate to the Ubuntu profile in the Profiles section of the sidebar
- Change the Command line field from
%SystemRoot%\System32\cmd.exetowsl.exe ~ -d Ubuntu - Now, open a new Ubuntu tab and run
pwd. The starting directory should now be/home/your-username
Oh My Zsh
The default appearance of the Linux command line is not exactly the best. We’re going to fix that using a Z shell framework called Oh My Zsh.
- First, we need to install Z shell (or simply Zsh). Do this by running
sudo apt install zshin your Ubuntu command line. - Make Zsh your default Linux shell:
chsh -s $(which zsh) - Make sure curl is installed by running
which curl. If it’s not found,sudo apt install curlto get it. - Now, install Oh My Zsh with the following command:
sh -c "$(curl -fsSL https://raw.github.com/ohmyzsh/ohmyzsh/master/tools/install.sh)"I like the default Oh My Zsh theme, but there are many others. In fact, Oh My Zsh is very customizable. Take a look at the Themes & Plugins sections of the wiki.
Congratulations! You now have a fancy terminal setup for both Windows and Linux.
At this point, you can go ahead and install any other packages you will use. In my case, the next thing I’d install on Ubuntu would probably be nvm to manage Node.js installations easily.
If all you care about is the terminal setup, then you’re done! There’s a lot more you can do, but you will figure out what is best for your needs as you go along. This is a good starting point to do that.
Beyond WSL and Terminals
Let us now go over some other apps I like to install on my Windows dev machines right away.
Docker
Sooner or later, you will run into Docker. I usually install this right away because I know I will end up needing it eventually.
Download Docker Desktop for Windows.
PowerToys
Here’s a Windows developer secret weapon. Microsoft PowerToys is a compilation of various utilities to make you more productive. It simplifies a lot of traditionally annoying tasks that should have been simple in the first place. Here are some things it can do:
- Pin certain windows to “always be on top” using
WIN+CTRL+T - Keep your PC awake with a click of a button, à la Caffeine for Mac. No need to mess with Windows power settings.
- System-wide color picker with
WIN+C(my personal favorite and most used utility) - Resize images by right-clicking and using the new resize menu options.
- Rename files in bulk using search & replace by right-clicking and selecting PowerRename. This also supports regular expressions for more advanced renaming.
Seriously, this thing is amazing. Install PowerToys using any of the methods listed on the page.
FileOptimizer
A webdev specific one. Optimizing images is something I need to do constantly, and my program of choice to do that on Windows is Javier Gutiérrez Chamorro’s FileOptimizer. It’s fast, customizable, and it gets the job done.
I Could Go On Forever
Really, we’ve just scratched the surface here. There are so many apps, plugins, extensions, and settings you could go for in order to improve your workflow.
I just tried to pick out what I feel are some of the most crucial ones to serve as a solid starting point for someone who is just getting started coding on Windows.


Leave a Reply