Table of Contents [hide]
Let’s talk about HTML emails, what they are, and why we need them. Then, we will learn how to make an HTML email ourselves using a framework called MJML. This is a guide to easily making custom, responsive HTML emails for those who understand basic HTML & CSS.
HTML Emails and Why We Need Them
HTML Emails are those colorful and fancy-looking emails you get from companies about anything from their newest products and marketing to shipping updates for your online orders.
They are an important marketing tool, they look great, and they can make your brand look better.
Why Not Just Use HTML to Write an HTML Email?
Sounds obvious, right? HTML and CSS work great for websites, so why wouldn’t we use them to make emails?
Writing HTML emails manually using plain old HTML has earned itself a reputation for being an absolute nightmare for developers.
But… it’s an HTML email: it’s right there in the name! I mean, how bad could it be?
It’s bad. HTML emails have to render not just in the browser, but on various email clients as well. The problem is, they all don’t support the same set of HTML and CSS features.
The main culprit here is the major email client, Microsoft Outlook. In 2007, Outlook switched to using Microsoft Word as its renderer instead of a web browser, whereas previously, it had used Internet Explorer.
Unfortunately, what that means for us is no Flexbox, no CSS Grid and all those great modern CSS tools we use today to style websites. Hell, you can’t even use divs!
That leaves us with a very small, very annoying set of HTML and CSS features that we can use to write emails that will be supported by all email clients and browsers.
Let me show you a basic HTML email template. Don’t worry, you don’t have to learn or understand this. Pretty soon, we’re not going to be worrying about any of it. Here:
<!DOCTYPE html PUBLIC "-//W3C//DTD XHTML 1.0 Strict//EN" "https://www.w3.org/TR/xhtml1/DTD/xhtml1-strict.dtd">

<html xmlns="https://www.w3.org/1999/xhtml">
  <head>
    <meta http-equiv="Content-Type" content="text/html; charset=utf-8" />
    <meta name="viewport" content="width=device-width, initial-scale=1.0" />
    <title>Your Message Subject or Title</title>
    <style type="text/css">
      #outlook a {
        padding: 0;
      }
      body {
        width: 100% !important;
        -webkit-text-size-adjust: 100%;
        -ms-text-size-adjust: 100%;
        margin: 0;
        padding: 0;
      }
      .ExternalClass {
        width: 100%;
      }
      .ExternalClass,
      .ExternalClass p,
      .ExternalClass span,
      .ExternalClass font,
      .ExternalClass td,
      .ExternalClass div {
        line-height: 100%;
      }
      #backgroundTable {
        margin: 0;
        padding: 0;
        width: 100% !important;
        line-height: 100% !important;
      }
      img {
        outline: none;
        text-decoration: none;
        -ms-interpolation-mode: bicubic;
      }
      a img {
        border: none;
      }
      .image_fix {
        display: block;
      }
      p {
        margin: 1em 0;
      }
      h1,
      h2,
      h3,
      h4,
      h5,
      h6 {
        color: black !important;
      }
      h1 a,
      h2 a,
      h3 a,
      h4 a,
      h5 a,
      h6 a {
        color: blue !important;
      }
      h1 a:active,
      h2 a:active,
      h3 a:active,
      h4 a:active,
      h5 a:active,
      h6 a:active {
        color: red !important;
      }
      h1 a:visited,
      h2 a:visited,
      h3 a:visited,
      h4 a:visited,
      h5 a:visited,
      h6 a:visited {
        color: purple !important;
      }
      table td {
        border-collapse: collapse;
      }
      table {
        border-collapse: collapse;
        mso-table-lspace: 0pt;
        mso-table-rspace: 0pt;
      }
      a {
        color: orange;
      }
      @media only screen and (max-device-width: 480px) {
        a[href^='tel'],
        a[href^='sms'] {
          text-decoration: none;
          color: black; /* or whatever your want */
          pointer-events: none;
          cursor: default;
        }
        .mobile_link a[href^='tel'],
        .mobile_link a[href^='sms'] {
          text-decoration: default;
          color: orange !important; /* or whatever your want */
          pointer-events: auto;
          cursor: default;
        }
      }
      @media only screen and (min-device-width: 768px) and (max-device-width: 1024px) {
        a[href^='tel'],
        a[href^='sms'] {
          text-decoration: none;
          color: blue;
          pointer-events: none;
          cursor: default;
        }
        .mobile_link a[href^='tel'],
        .mobile_link a[href^='sms'] {
          text-decoration: default;
          color: orange !important;
          pointer-events: auto;
          cursor: default;
        }
      }
      @media only screen and (-webkit-min-device-pixel-ratio: 2) {
        /* Put your iPhone 4g styles in here */
      }
      @media only screen and (-webkit-device-pixel-ratio: 0.75) {
        /* Put CSS for low density (ldpi) Android layouts in here */
      }
      @media only screen and (-webkit-device-pixel-ratio: 1) {
        /* Put CSS for medium density (mdpi) Android layouts in here */
      }
      @media only screen and (-webkit-device-pixel-ratio: 1.5) {
        /* Put CSS for high density (hdpi) Android layouts in here */
      }
    </style>
    <!--[if IEMobile 7]>
      <style type="text/css">
        /* Targeting Windows Mobile */
      </style>
    <![endif]-->
    <!--[if gte mso 9]>
      <style>
        /* Target Outlook 2007 and 2010 */
      </style>
    <![endif]-->
  </head>
  <body>
    <table cellpadding="0" cellspacing="0" border="0" id="backgroundTable">
      <tr>
        <td>
          <table cellpadding="0" cellspacing="0" border="0" align="center">
            <tr>
              <td width="200" valign="top"></td>
              <td width="200" valign="top"></td>
              <td width="200" valign="top"></td>
            </tr>
          </table>
          <a
            href="https://htmlemailboilerplate.com"
            target="_blank"
            title="Styling Links"
            style="color: orange; text-decoration: none;"
            >Coloring Links appropriately</a
          >
          <img
            class="image_fix"
            src="full path to image"
            alt="Your alt text"
            title="Your title text"
            width="x"
            height="x"
          />
          <span class="mobile_link">123-456-7890</span>
        </td>
      </tr>
    </table>
  </body>
</html>Tables instead of divs, inline styles, media queries for days, and all that boilerplate just to support email clients.
Like I said, it’s B A D.
Enter MJML
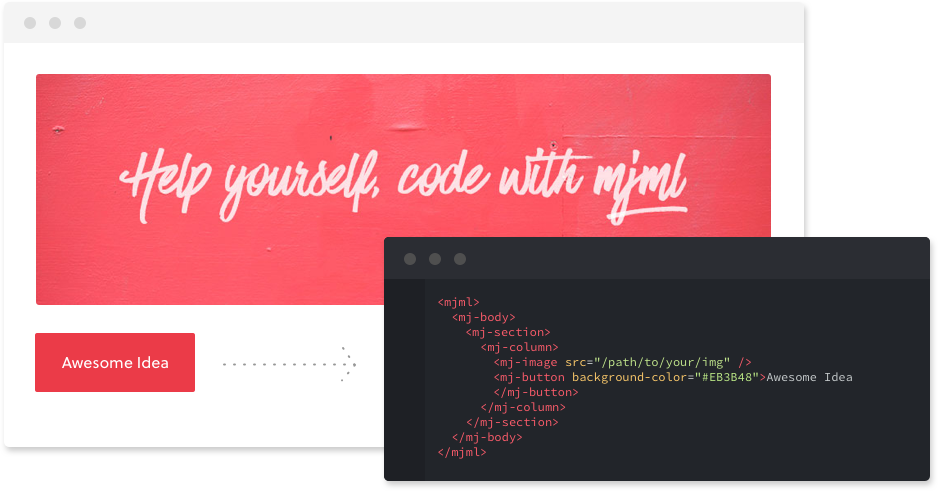
Created by Mailjet, MJML calls itself a responsive email framework. MJML stands for Mailjet Markup Language. From the documentation:
MJML is a markup language designed to reduce the pain of coding a responsive email. Its semantic syntax makes it easy and straightforward and its rich standard components library speeds up your development time and lightens your email codebase. MJML’s open-source engine generates high quality responsive HTML compliant with best practices.
Download & Installation
Requirements: All you need is to have Node.js installed. You do not need to understand Node.js or, in fact, any JavaScript at all.
- Install MJML globally with
npm i -g mjml - Now we can compile our MJML file into a normal HTML file simply with
mjml -r input.mjml -o output.html
Refer to mjml.io’s download page for more ways to install, build, and run MJML.
Editing MJML
There are a few ways to write and edit your code:
- A text editor. MJML offers plugins for Visual Studio Code, Atom, and Sublime Text.
- In your browser using MJML’s own live editor. No installation needed.
- Using the dedicated MJML App. MJML is included.
Personally, I prefer to stay in my text editor. I use VS Code’s MJML extension to open a preview of my work using the command palette.
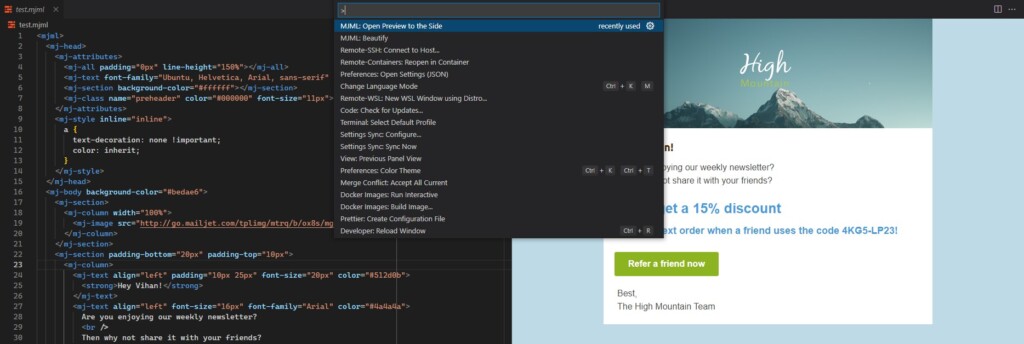
That said, the live in-browser editor does roughly the same thing with zero setup required.
Writing Our First HTML Email
Time to actually make our very own responsive HTML email.
Document Structure
Let us first start with the general structure of an MJML document. It’s similar to HTML, but simplified:
<mjml>
  <mj-head>
    <!-- Document Head -->
  </mj-head>

  <mj-body>
    <!-- Document Body -->

    <mj-section>
      <mj-column>
        <mj-text font-size="18px">Hello, World!</mj-text>
      </mj-column>
    </mj-section>

    <mj-section>
      <mj-column></mj-column>
      <mj-column></mj-column>
    </mj-section>
  </mj-body>
</mjml>Images
With the structure out of the way, let us take a look at how to embed images in our email. As you may already know, there are background and foreground images in HTML, and they work differently. We’re going to look at both.
Background Image
In our existing document, let’s add a background image to an <mj-section> tag in the body. This is the same as adding background-image: url(/images/bg.jpg) using CSS:
<mj-section background-url="/images/bg.jpg"> ... </mj-section>Foreground Image
Now, let’s add a foreground image, i.e. an <img> tag in regular HTML:
<mj-image src="/images/example.jpg" alt="Example Image"></mj-image>Buttons
Almost every HTML email needs a call-to-action. Let us look at how to create links in MJML:
<mj-button href="https://example.com">Click me!</mj-button>Customizing Elements
You can add CSS properties to any element by simply inlining them in your markup. Try styling your button with some colors and spacing:
<mj-button
  href="https://example.com"
  color="white"
  background-color="#4A4A4A"
  border-radius="10px"
  padding="5px"
>
  Click me!
</mj-button>Those are the basics, and they’re enough to make a simple layout for your first HTML email.
Once again, check out MJML’s documentation. There’s a lot more you can do with it.
Build & Output
Once we’re happy with how the email looks, we will want to build our code into an actual .html file that will become the content of the email we want to send.
It’s actually really simple. Run this command in your terminal, replacing the input file name with your .mjml file. The output .html filename can be whatever you want:
mjml -r input.mjml -o output.htmlTest Your Work
The HTML file is ready. You can, of course, open it in your browser and look at it. However, what you probably want to do is actually test it out in action.
By sending it as an actual email to yourself, you can look at it on all your devices, especially on those pesky email clients. This is especially important because you will want to make sure all your images and layouts are rendering properly on all types of screen sizes and email clients.
The simplest way to do this is to open your newly minted email template in the browser, select all the contents of the page with CTRL + A (or CMD + A on Mac), copy it, and then paste the contents into your email compose body. It should appear along with all of its formatting.
If this doesn’t work, some email clients also let you insert HTML.
Other ways to test HTML emails include services like Litmus PutsMail and Postdrop. Most of these also have generous free tiers.
MJML Templates
Before we finish, I wanted to make a quick mention of MJML templates, which are a good resource that anyone learning MJML should know about.
There are a solid number of templates on the MJML website, and they are great as references when writing your own MJML. On top of that, they are all free for you to use and customize to fit your needs and use for your next HTML email!
…And Beyond!
That’s it! We just went through everything you need to know to create your own custom, responsive HTML emails. And we did it without any of the headaches people have had to deal with in the past in order to get this job done.
But don’t stop here.
This post covers a very small set of the cool things MJML can actually do, so head on over to the aforementioned MJML docs and start improving.
Here are some links from the docs that are worth a look:
- Basic Layout Example: Learn how to start making more complex layouts with MJML
- mj-include (a.k.a. template partials)
- Standard Head components: Set sensible defaults for your styles and do some other really cool tricks (check out
mj-preview&mj-html-attributes) - Standard Body components: These include components for some really neat things you don’t often see in emails like accordions, carousels, and navbars
Leave a Reply